Steps to be followed:
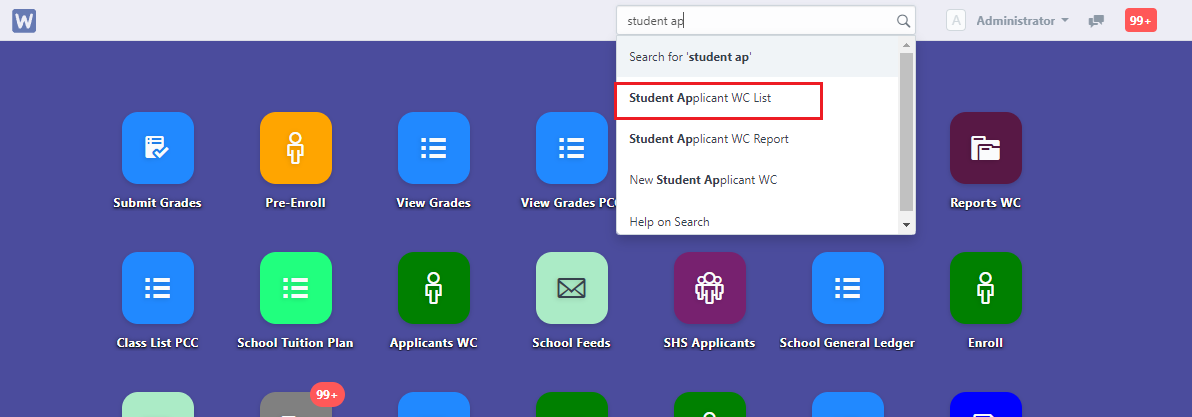
- Once a student finishes the enrollment phase, go to Student Applicant WC by searching it on the search bar.
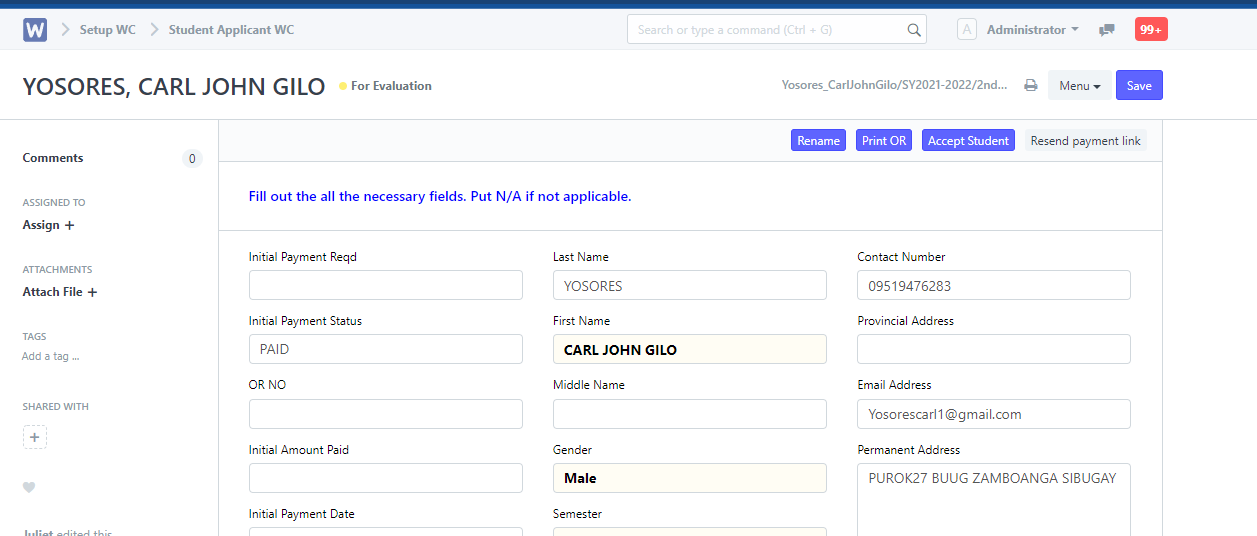
2. Click the student’s name.

3. Click the Accept button.
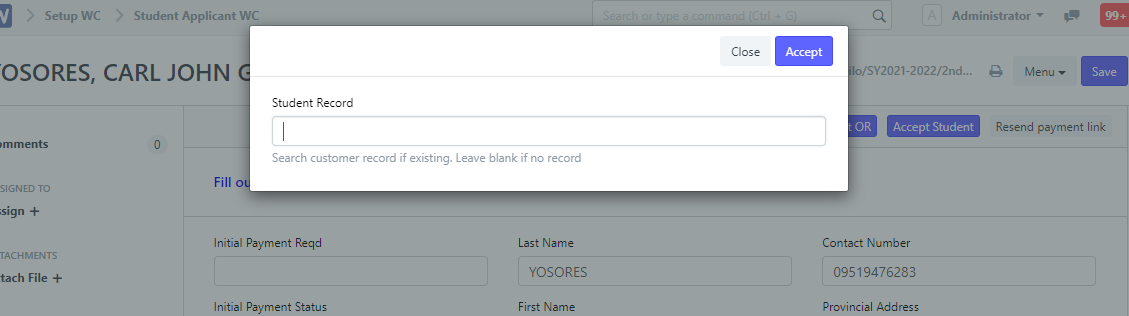
4. Input student’s name on the Student Record field. Then click Accept.
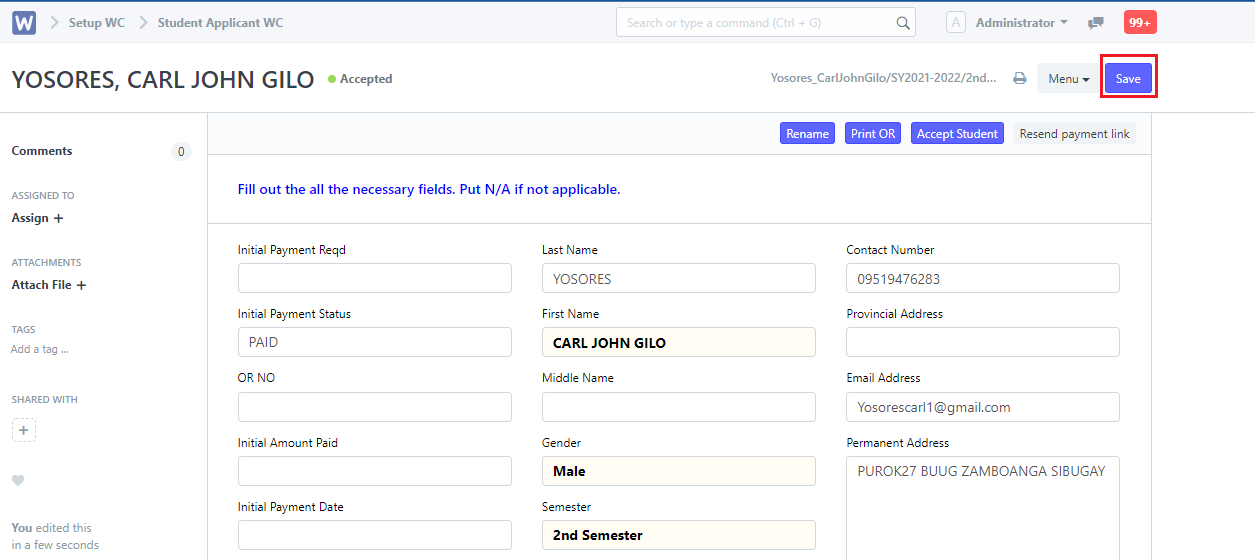
5. After clicking accept, click Save.